Saturday 29 June 2013

TV and radio presenter Georgie Bingham has always been somewhat of a hair chameleon changing style on a regular basis and in the last 12 months going shorter and shorter until reaching her current platinum pixie.

Here's some pictures from the last year or so. Looking good Georgie!

Long With a Blunt Fringe


A Cute Bob Cut


Pixie Cut With Quiff


Side-Parted Pixie


Short Platinum Pixie


Tuesday 18 June 2013


Pin It

Crafting on the Move brings about problems of how to transport your materials.  I'm going to be going away for a few days of retreat and want to take some art materials, particularly my Neocolor II watersoluble crayons.  I originally had a box of 12 Neocolors but have gradually been building my collection by buying one or two here and there.  That means the original tin is no good for storing them because I have so many more now.

Back in January last year I made a box to store them in by covering a chocolate box with hand made paper.


Yes, I am a little careless when using spray inks, that's what you see inside the lid.
But there you have it, my collection of neocolors.  Now that box works well when in the craft studio, but what about on the move?  As soon as I put that box into the bag I use for crafting on the move, the lid will fall off and all the crayons will fall out, right?  So I thought about making a crayon wrap, and even started to make one, then I lost the bias binding I bought to trim it and could not be bothered with the hassle of making my own.  So, what to do?

Simple.  I grabbed some wide elastic from my sewing box and made loops that were a bit smaller than the box so that it would be just tight enough when on there.  I dyed them by using simple spray inks.  And there you have it, a box with a lid that stays put no matter what, when I want to use my Neocolours on the move!


Now to come up with a solution for my pencils . . . . . and there is no time left for making a pencil wrap!


You can check out the sites I link up to over in my sidebar. Before you go, why not check out my recipes index page, or my craft projects index page, I am sure you will find something there to interest you.

Friday 14 June 2013

So, are you thinking about a summer fun list or a summer bucket list?  Has your summer already begun or is it yet to be?  This is my Summer fun list and how I made it:


Pin It

If you just want to skip to the making of the list, scroll down, however I need to explain something for those that are interested.  First of all let's talk about what you class as summer to what I class as summer.  For all my American friends with children of school age, summer lasts about 10 weeks I think and on the whole has already started.  For those of us in the UK with children of school age, summer is 6 weeks, the last 2 of July and the whole of August.  For those of us in the UK with children at university it's more complicated, but depending on where they study and what course they do you're probably looking at 8 to 10 weeks, ending sometimes mid to late September.  To add to that confusion, if you have a child at the end of either their compulsory education doing GCSE exams, or what comes 2 years after that, A-Level exams, then they finish, well, on the day of their last exam.

I have one at university, but he's only going to be home for a couple of weeks as he has picked up 6 weeks work at the Edinburgh Fringe Festival.  My other is just finishing his A-levels with one more exam next week.

So I get a long summer this year right?  NOPE, well, not exactly.  I work in local schools, so I will still be working up until the end of that 2nd week in July.  :-(   BUT I only work a few hours a week and can arrange other activities around that, so I decided my summer list could start this coming weekend!

Because I will have those hours for work to fit around I decided my summer bucket list needed to take the form of some sort of calendar.  And so, this project was born.

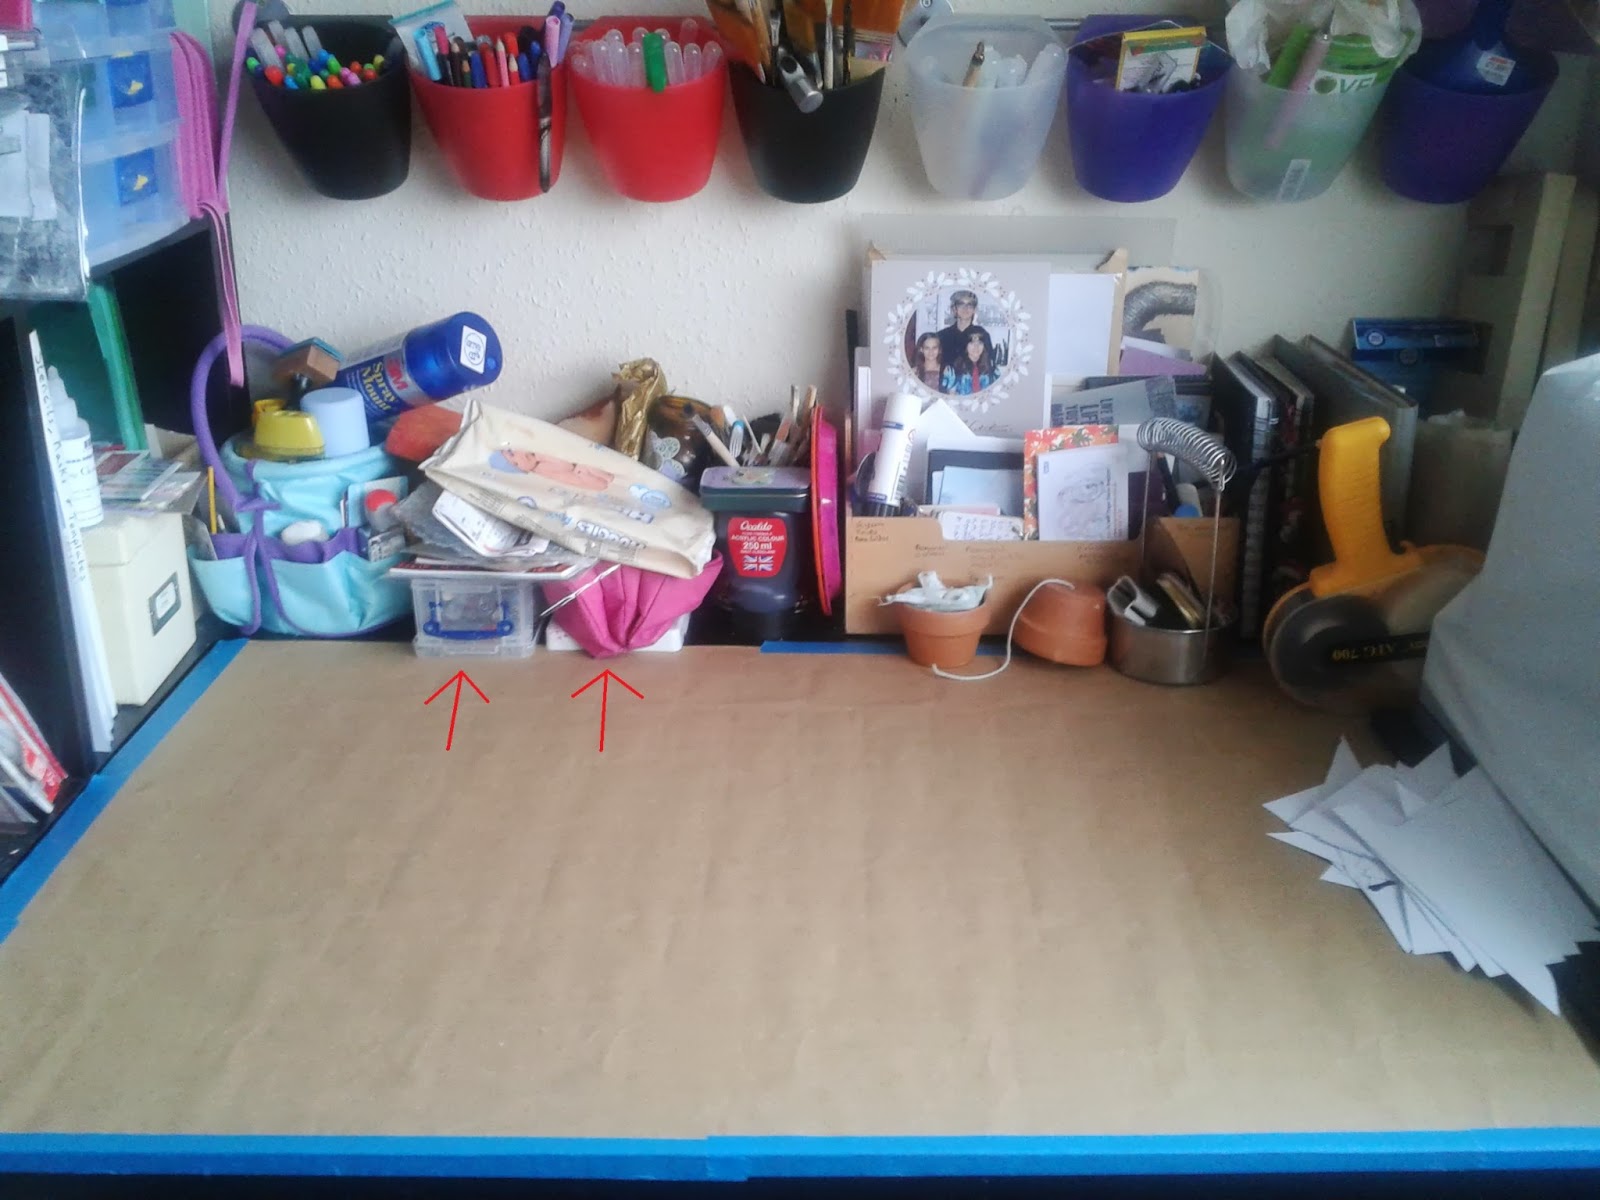
I went through my stash of watercolour paper and found a pad that I had picked up from my father's house after he passed away recently.  It's fairly heavyweight, I think around 300lbs, is 12" by 18" and is a bound pad, where it is glued on all 4 sides and you use a pallet knife or other blade to separate the pages AFTER you've finished the piece (it keeps your paper flat in the same way taping it to a board would).

2013-06-11 17.29.18

You can't see very well, but I pencilled in a rough idea of spacing.  I made a 1/2" border all around the outside, a 1" space across the top for a title and 1" across for each of the weeks I needed to include (11).  Then I split each row into 7 columns for the days of the week.

Since this was only rough spacing I did not worry too much about those columns being even and so went with 1 1/2" working from each side into the middle, which left the centre column wider than the others.

2013-06-11 17.30.46

I made a template for the boxes from a piece of card.  I cut a piece that was 1" by 1 1/2" then trimmed it down a little, rounding the corners.  And I used my 0.8mm fineliner pen to draw around it, 77 times!

Because I know my spacing would be off due to that centre column being wider, I drew the two end columns first on each row, then the middle, then filled in the gaps.

2013-06-11 17.32.23

2013-06-11 17.32.29

2013-06-11 17.39.09

I pulled out my French Curves and pencilled in a border that kind of matched the 1/2".

2013-06-11 18.00.38

I knew I wanted to spray colour for the main panel, but wanted to keep those edges white for something else, so I masked the edges off using masking fluid.

2013-06-12 10.13.27

Masking fluid has a habit of completely ruining your brushes so I have taken to applying it with a cotton bud (q-tip).

2013-06-12 10.19.37

I took a Dylusions spray in blue that I have watered down by half again, and a spray I made from water and a lilac Inkadink and covered the page.

2013-06-12 10.28.07

I rolled a roll of kitchen towel across to mop up the puddles of ink.

2013-06-12 10.29.06

I removed the masking fluid and went over the edge with a thicker tip pen. I used a fineliner pen to write in the dates into the boxes, I thickened up the line on the Sundays with a chisel tip pen and I wrote in the words. I used a black calligraphy pen for the title and metallic calligraphy pens in blue and purple for the list.

2013-06-12 12.16.42

I thought about leaving it there but I decided it needed something more and I wanted to include more items for the summer fun list anyway.

I used my french curves again and drew another line outside the original border, in a similar way but not trying to match it exactly. I filled in the outside with a black brush pen then grabbed a couple of metallic jelly roll pens and wrote the extra words into the gap that was left.

2013-06-13 16.32.57

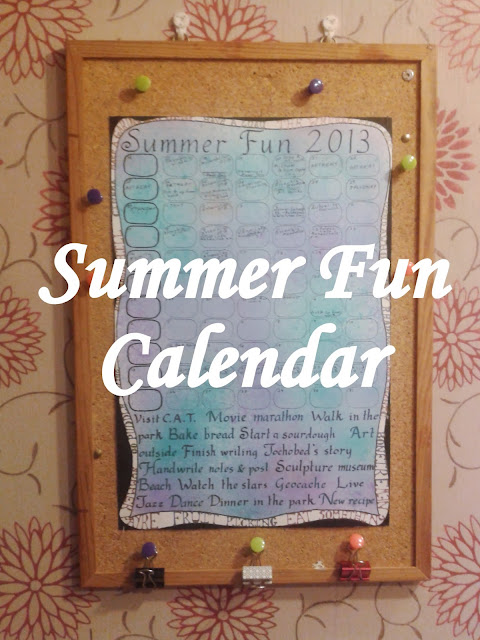
I mounted it onto a pin board that I had spare, using sewing pins at an angle (less visual intrusion into the piece than push pins), and put some spare push pins around it for attaching anything I need to over the summer. I used 3 push pins at the bottom with 3 bulldog clips to make somewhere else to store items.

A closer look

2013-06-13 16.33.24

2013-06-13 16.33.46

The list is:

  • Visit C.A.T. (Centre for Alternative Technology)
  • Movie marathon
  • Walk in the park
  • Bake bread
  • Start (or that should be restart after I killed my last one) a sourdough
  • Art outside
  • Finish writing Jochobed's story
  • Handwrite notes and post
  • Sculpture museum
  • Beach
  • Watch the stars
  • Geocache
  • Live jazz
  • Dance
  • Dinner in the park
  • New recipe
  • Fruit picking
  • Eat something new
  • Summer fayre
  • Go puddle jumping
  • Haughmond Hill
  • Cinema
  • Make a garden water feature
  • Have a luau
  • The Wrekin
  • Crazy golf
  • Spend a whole day reading
  • Proper Picnic
  • Bonfire


You can check out the sites I link up to over in my sidebar. Before you go, why not check out my recipes index page, or my craft projects index page, I am sure you will find something there to interest you.

Thursday 13 June 2013

I found this recipe on facebook.  It's almost gluten free.  I used standard baking powder, but if you substituted a gluten free baking powder they would be entirely gluten free.  To be honest I was not too hopeful of how they would turn out but they were amazing!


Pin It

2013-05-23 10.49.16

Chocolate Chip Chickpea Cookies

You will need:
1 1/4 cups canned* chickpeas, well-rinsed and patted dry with a paper towel
2 teaspoons vanilla extract
1/2 cup + 2 tablespoons (165 grams) natural peanut butter
1/4 cup (80 grams) honey (agave would be amazing too!)
1 teaspoon baking powder**
a pinch of salt if your peanut butter doesn’t have salt in it
1/2 cup (90 grams) chocolate chips

Cooking Time: 10 minutes
Prep Time: 15 minutes

2013-05-23 10.52.46

Take the time to dry them well.  I couldn't find any paper towel, so I used a tea towel instead.

2013-05-23 10.58.24

There you go, from a full tin of chickpeas, I measured 1 1/4 cups and those on the plate are what was leftover.  I think with that few extra, in future I will just use the whole tin and not bother measuring.  Your tins might differ from mine, so worth checking the first time you make them.

2013-05-23 11.00.57

Do you like my new kitchen scales?  Quite sleek aren't they?  If you spray your measuring cup with oil before scooping the peanut butter it makes cleanup easier.

2013-05-23 11.05.56

I swear that scale read 80g when I picked the camera up.  Oh well.  Again, spraying with oil before measuring out the honey will help with clean up.

2013-05-23 11.08.40

And finally, the chocolate chips.  I used plain chocolate, but I am sure milk chocolate would work just as well.

DIRECTIONS:
Preheat your oven to 350°F / 175°C.

2013-05-23 11.11.26

Combine all the ingredients, except for the chocolate chips, in a food processor and process until very smooth. Make sure to scrape the sides and the top to get the little chunks of chickpeas and process again until they’re combined.  I think the fact that I used chunky peanut butter didn't help and next time I will make it with smooth.

2013-05-23 11.14.03

Put in the chocolate chips and stir it if you can, or pulse it once or twice. The mixture will be very thick and sticky.

2013-05-23 11.19.14

With wet hands, form into 1 1/2″ balls. Place onto a piece of parchment paper. If you want them to look more like normal cookies, press down slightly on the balls. They don’t do much rising.

2013-05-23 11.37.25

Bake for about 10 minutes.

2013-05-23 11.56.04

Soft, gooey cookies that do not in any way taste like chickpeas!  AMAZING!  They didn't last long at all so I can't give you any idea of their keeping properties!


You can check out the sites I link up to over in my sidebar. Before you go, why not check out my recipes index page, or my craft projects index page, I am sure you will find something there to interest you.

Thursday 6 June 2013

Did you see the journal I made the other day.  The one with the fancy edges to the pages?  Well now it has a cover.


Pin It

This is all from a class by Valerie Sjodin, so I won't be sharing any how to, but I thought you might want to see my progress.

First of all I worked on the flap, I pencilled in the two lines that the word retreat sits between in the photo above, then wrote in the letters as you see.  Once I began adding the other lines, above the letters I could see the necklace form take shape and so I drew in those beads as well.  I knew which bible verse I wanted to put in there, but it kind of went wrong, as you can see below.  But I managed to fix that, which you will see later.


I will be using this journal when I go on retreat later this month, hence the word on the flap and the quote I chose for under the flap.  I wrote that using a Zig calligraphy pen.


Then came colour and the fixing of the mistake on the flap.  I cut another piece of watercolour paper the same shape as the area with the lettering on it and re worked the lettering, then glued that onto the flap to cover up the mistake.


I embossed the beads on the necklace shape using a Zig embossing pen and gold embossing powder.


The class is still open, why don't you come join us?  As a mini class it's not expensive.


You can check out the sites I link up to over in my sidebar. Before you go, why not check out my recipes index page, or my craft projects index page, I am sure you will find something there to interest you.

Wednesday 5 June 2013


Pin It

After a recent clear up my craft room desk looked something like this:


I had all the pens that can be stored upright in those pots from IKEA hanging off the rail.  That was great, but there are lots of pens that have to be stored horizontally.  Double ended pens, Pitt pens, etc.  I had those in the box and pencil case marked by the red arrows.

That was fine, but every time I wanted a particular pen I had to sort through both the box and the pencil case to find the right one.  I knew I had seen various pen storage methods, both purchased and DIY versions, so I decided to make something myself.  I didn't want anything that I would have to buy too much stuff for and if I could get away without buying anything at all, so much the better.  That ruled out any of the ideas made from plumbing pipe and also anything made from Pringles tubes, etc as I would have to go get those too.

Then I realised I have lots of off cuts of foam board from when we have made Bible Story props for Open the Book.  So I went looking for ideas that would help me use that.  I found whole Pinterest boards devoted to craft desk storage ideas made from foam board.  Amazing.  The site I ended up using was on My Magnolia World.  I took her instructions and I changed the dimensions to fit my desk.

If you go to her site the instructions are really clear for how to put it together.  Copics are shorter than a lot of the double ended pens I wanted to use and I didn't have as much space to play with as she did, so I went with these dimensions in the end:

Cut two at this size for the Top and Bottom - 5 1/2 inches * 8 1/4 inches
Cut 6 at this size for the sides and each of the shelves - 5 1/2 inches * 8 inches
Follow the instructions on the linked site and you will get a smaller unit than hers that is deeper front to back to allow for longer pens.


The unit sits in the same space the box and pencil case occupied.  Well maybe with a few things pushed up just a little bit to one side.  And now I can see all my pens straight away and grab exactly what I need quickly and easily.  I know it doesn't look really smart, because being offcuts, some of the pieces already had paint etc on them, but it does the job and that is what matters.


Yes, that's a computer monitor on my wall.  Don't I have the best husband in the world?  I have a computer in my craft room now.  It didn't cost us anything because it was one someone else had previously given away.  Let's face it, I don't need it to do a lot up there, access the internet for craft videos, and print the occasional thing to the printer downstairs.  That's about it really. He even bought me a wireless keyboard and mouse so that I don't have to take up valuable desk space with them when I am not using them.


I'll make a post later in the week about the cd rack, which is where I store my unmounted stamps and another about the text in the picture frame.

I also hope to make a post about the progress I am making with the hand made journal with fun edges I posted about the other day.


You can check out the sites I link up to over in my sidebar. Before you go, why not check out my recipes index page, or my craft projects index page, I am sure you will find something there to interest you.