 11:43
11:43
 Unknown
I am still making costumes and props for our Open the Book Team. Open the Book is a program that takes weekly Bible Story assemblies into schools that are local to the church providing the team.


Then I trimmed the fringe to give as straight a finish as I could manage. I don't think I would have made a very good hairdresser, ho hum.

So far, I have shared our first team photo (we were the 1000th team to be registered), quick and easy basic costumes, Joseph's Multi coloured coat and a basic male Egyptian costume as well as one or two props.
Today we have a black wig for an Egyptian princess because this week's story was about Moses being discovered in his basket floating on the water by Pharaoh's daughter.

I had looked in a number of places online for solutions for this part of this costume and got absolutely nowhere as far as making something is concerned. I did read something about making fun play wigs for children using yarn and a baseball cap with the brim cut off. I went through my yarn stash (what is left of it) and found that I did have some black yarn, but I couldn't find an old baseball cap, so I grabbed the next best thing, an old fleece hat. Fleece is good for this because it won't fray when you cut it, whereas a knitted hat would. You can see that I cut part of the fabric away. This is part of the section that would be turned up when wearing the hat. In the end I went back in and cut all of that section away, but it is up to you whether you do that.
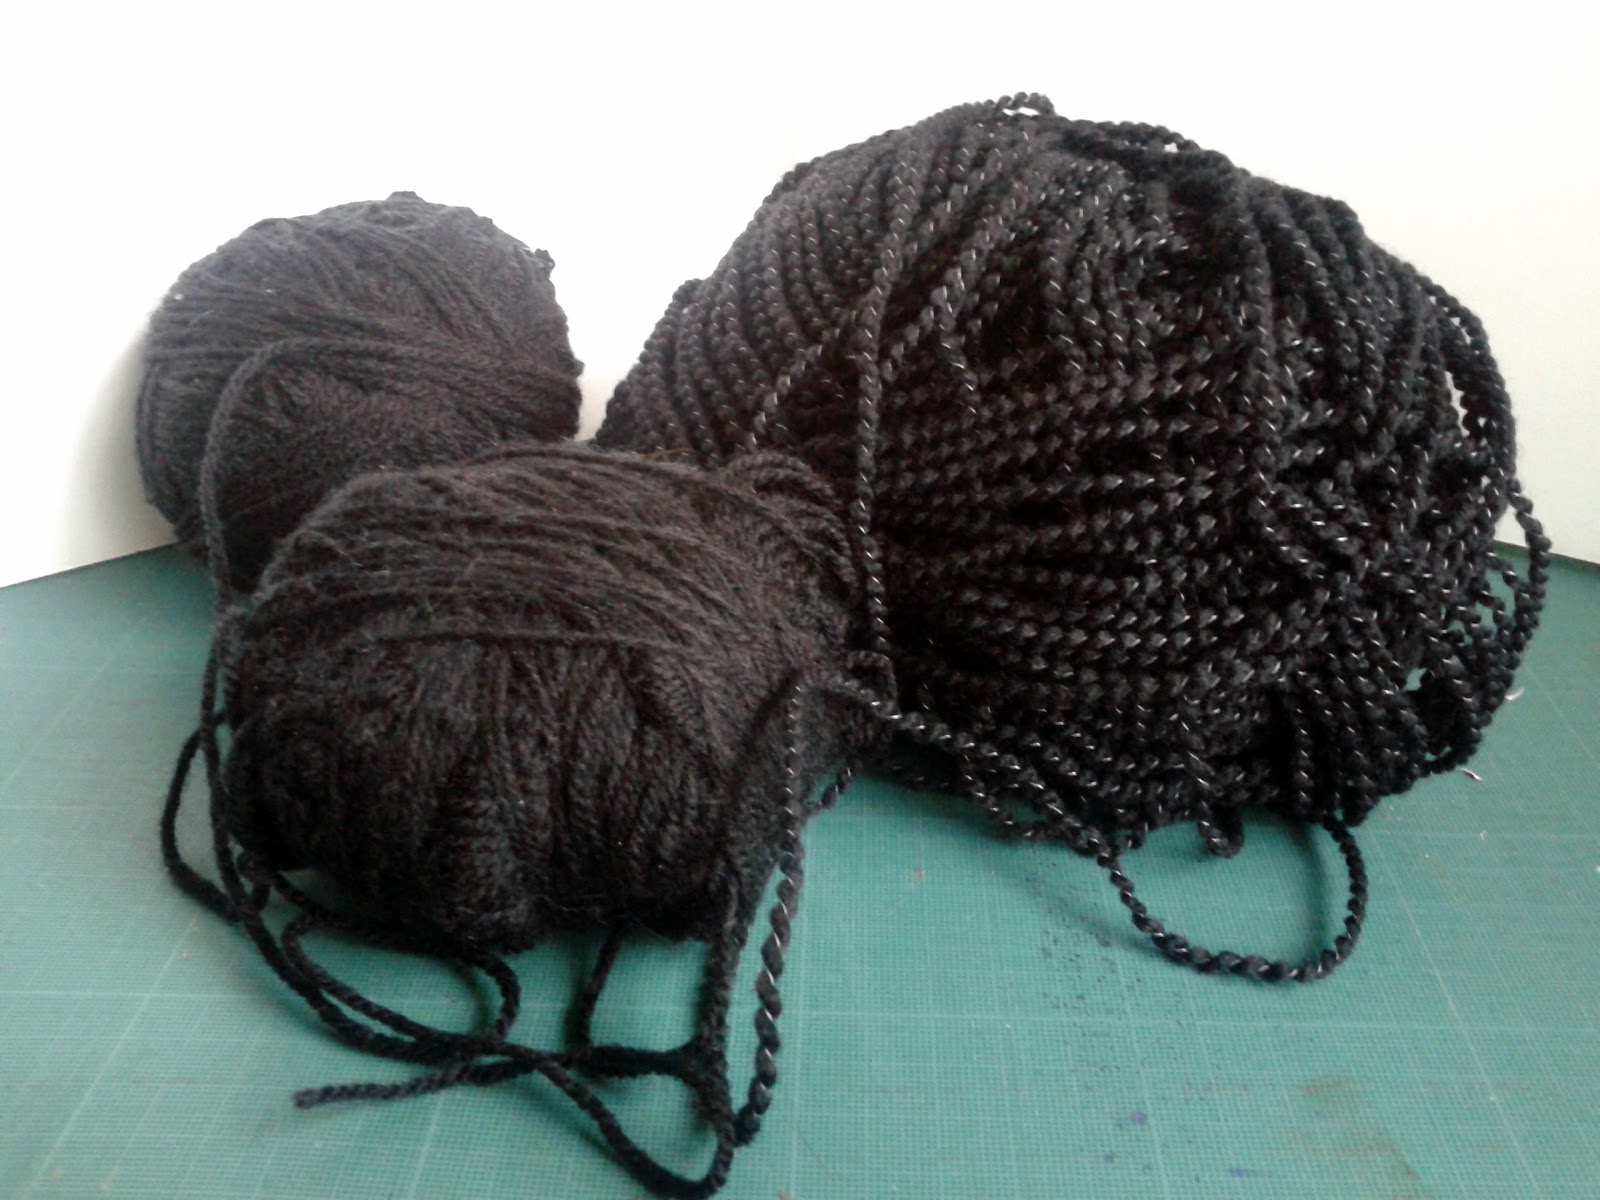

I worked out and marked where each of the layers would be attached to the hat and began to cut yarn to double the length. I then gathered a bundle of cut lengths together and tied them at the midway point, in a knot. I used 4 strands together for the chunkier yarn and 7 for the Double Knit yarn. This worked OK, but I soon worked out a better way. Find or cut a piece of card (I used foam board that I happened to have) that is the length you want that layer of hair to be and wrap the yarn around and around and around it.

Don't go all the way across your card, you will need some space to section it off. Also, do not wrap too tight, this will stretch the yarn and mean your finished product is not as long as you want. Keep it only just tight enough to not slip but no more. Then, using a spare piece of yarn, gather the correct number of strands at one end of the board and slip the spare piece underneath them, tying it off. Do this all the way across the board.

The simply slip your scissors under the strands of yarn at the other end of the board and cut across. You will be left with lots of bundles of yarn.
Take your hot glue gun and begin attaching your bundles, at the knotted end, to the hat. You can either go all the way around and cut a fringe in later or do what I did and leave space for the fringe. Try and keep the tops of the yarn in as straight a line as possible and keep gluing.

On that photo you can see that I decided to do 4 layers of bundles, the bottom line you see there, the two lines you see marked, and the very top of the head. To be honest this gave a very thick and full wig that feels a bit bulky when wearing and I would suggest that 3 layers in total would be enough.
This next photo show you how I tried to keep things even. I would glue on the front ones on each side, the centre back ones, and then split each side into sections, gluing on one to mark the section first, then filling it in. I made these later bundles slightly longer than the first one.

Keep going until you have your first three layers done, or two layers if you have decided on 3 layers in total.

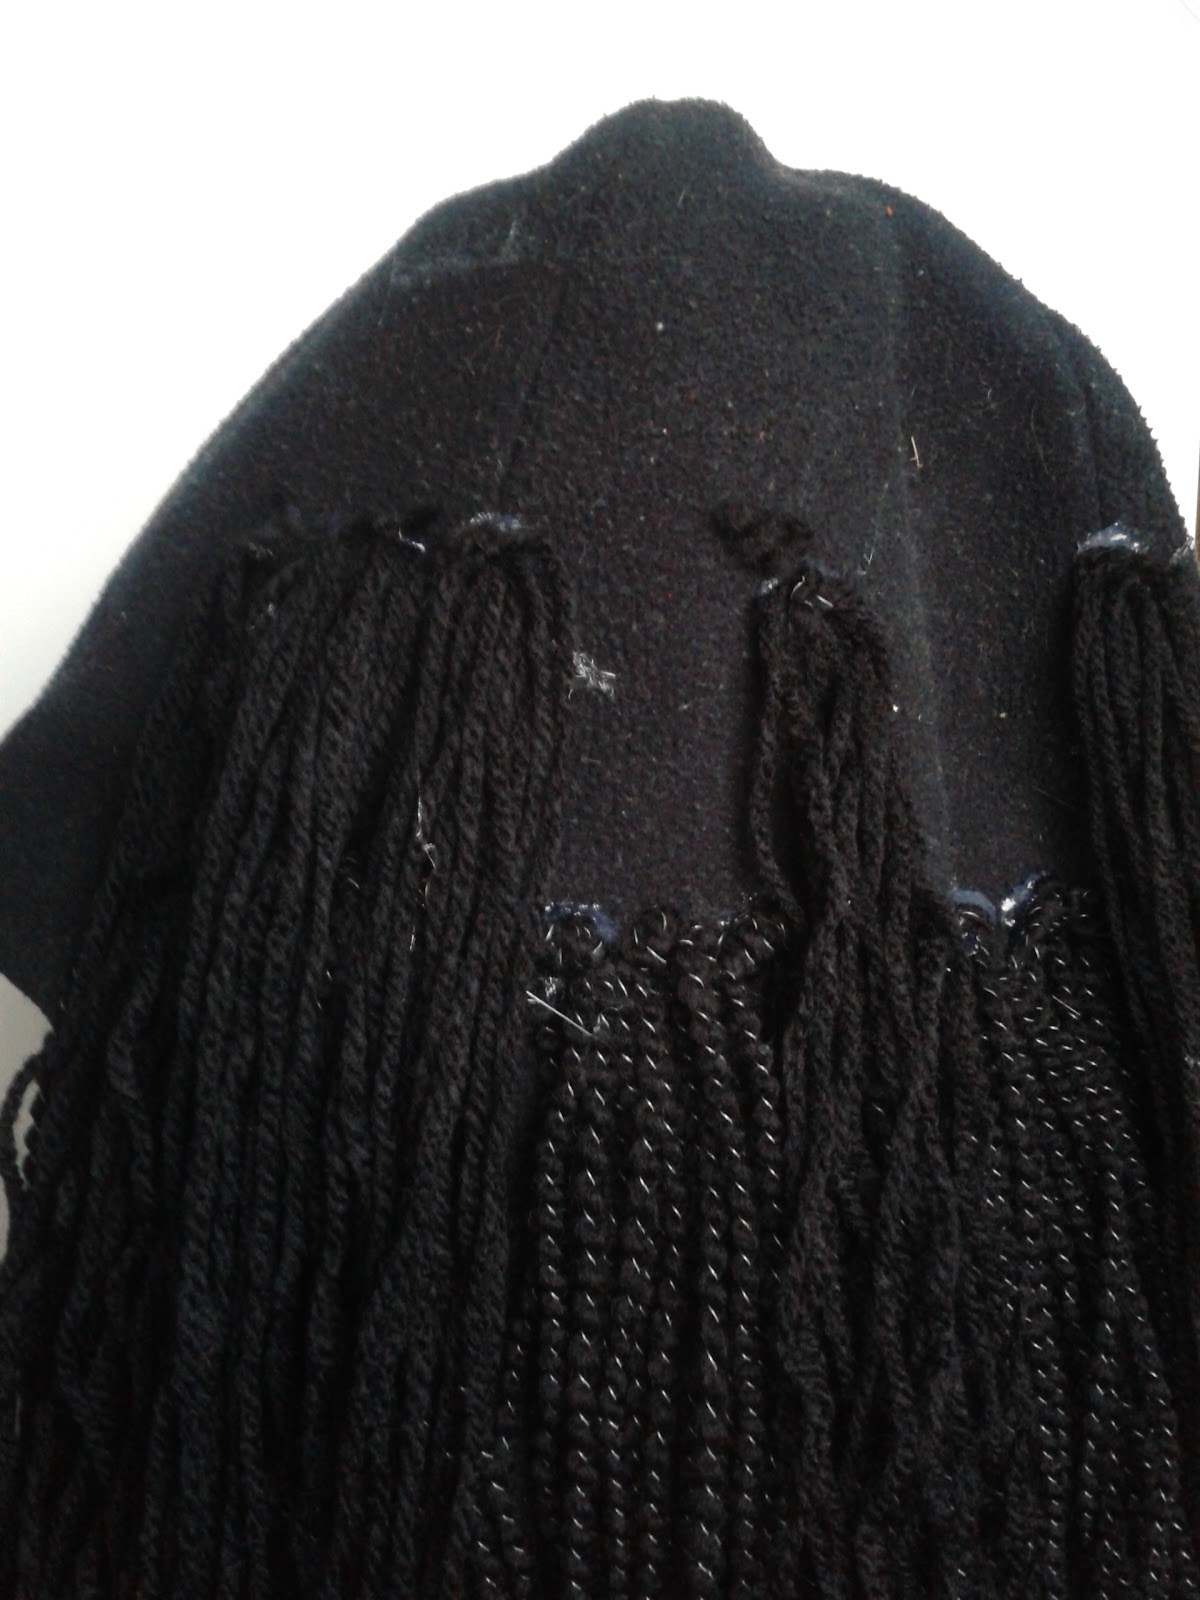
Then you need to work on the fringe. Obviously the fringe (bangs) needs to be long enough to cover the remaining edge of the hat, other than that it is up to you. I did two layers in much the same way as the sides.

The simply slip your scissors under the strands of yarn at the other end of the board and cut across. You will be left with lots of bundles of yarn.
Take your hot glue gun and begin attaching your bundles, at the knotted end, to the hat. You can either go all the way around and cut a fringe in later or do what I did and leave space for the fringe. Try and keep the tops of the yarn in as straight a line as possible and keep gluing.

On that photo you can see that I decided to do 4 layers of bundles, the bottom line you see there, the two lines you see marked, and the very top of the head. To be honest this gave a very thick and full wig that feels a bit bulky when wearing and I would suggest that 3 layers in total would be enough.
This next photo show you how I tried to keep things even. I would glue on the front ones on each side, the centre back ones, and then split each side into sections, gluing on one to mark the section first, then filling it in. I made these later bundles slightly longer than the first one.
Keep going until you have your first three layers done, or two layers if you have decided on 3 layers in total.

Then you need to work on the fringe. Obviously the fringe (bangs) needs to be long enough to cover the remaining edge of the hat, other than that it is up to you. I did two layers in much the same way as the sides.

Then I trimmed the fringe to give as straight a finish as I could manage. I don't think I would have made a very good hairdresser, ho hum.

That just leaves the top of the head to finish.

I decided that I would do the front and back section in slightly different ways. Truly the easiest way to show you that is with a diagram, because if I try and explain it in words, it probably won't make sense.

Because I realised at this point that I had worked slightly lopsided, I made the two sides meet, slightly to one side of the seam line of the hat. You need to be more careful with your glue now, making sure you cover up all the blobs of glue with the yarn, leaving none showing. For me this worked best by working with two bundles of yarn at a time. I applied a line of hot glue, across the seam line and then placed the two bundles into it, touching each other in the middle.


Next week I have no costumes to make, so if you check in here, there might be another craft project, or maybe some art journal pages.

I decided that I would do the front and back section in slightly different ways. Truly the easiest way to show you that is with a diagram, because if I try and explain it in words, it probably won't make sense.

Because I realised at this point that I had worked slightly lopsided, I made the two sides meet, slightly to one side of the seam line of the hat. You need to be more careful with your glue now, making sure you cover up all the blobs of glue with the yarn, leaving none showing. For me this worked best by working with two bundles of yarn at a time. I applied a line of hot glue, across the seam line and then placed the two bundles into it, touching each other in the middle.

Keep going until you have covered the top of the head as shown in the diagram. You may then want to trim the bottom of the hair to even it up a bit. I did a little, but not too much.
Finally, I chose to braid some strands at the front on each side. I did about 6 thin braids on each side.

And there you have it, an Egyptian Princess Wig.

All in all it took me a total of about 3 hours, but if you dropped the one layer like I suggested, you could get it finished quicker than that, and it is the sort of work that can be done while watching TV as long as you have an electrical socket nearby for the glue gun.
It would work equally well in other colours for fancy dress costumes and so on.
If you put my wig together with my team members ability to put costumes together out of seemingly nothing, you get a fantastic result.

 Posted in


.jpg)


0 comments :
Post a Comment