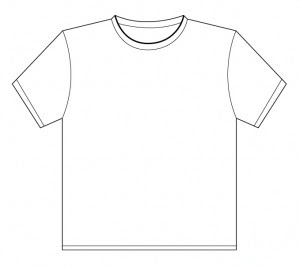
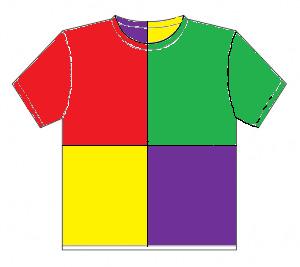
How do you go from this:
To this:
It's not all that difficult actually, as long as you have a sewing machine that will do stretch stitches for knit fabrics and a good pair of scissors you should be fine. Please excuse the quality of the photo, we have a teacher taking photos from the back of the assembly hall, and I forgot to ask her to get a good shot of the coat. I am making these bible costumes for use in our local school. A team from the church I attend are doing weekly Bible Story assemblies under the Open The Book scheme. We are up to the story of Joseph . . . .
# You need 4 or 5 T-shirts in bright colours.
All the same size and fit. I made the mistake of not checking the fit, so while they were all X-Large, some were slim fit and some were loose fit. If you make sure they all match it will be much easier. We bought ours from Primark and 5 T-shirts came to just £11.
# I took all the shirts and with my large cutting mat, quilting ruler and rotary cutter, cut each shirt into a top and a bottom, about 4 or 5 inches below the armpits. You could do this with scissors too.
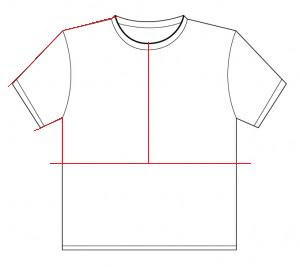
# Decide which two colours you want for the front and cut up the middle of the front, along the side and underarm seam, and the along the shoulder seam and out through the halfway point of the sleeve, like so:
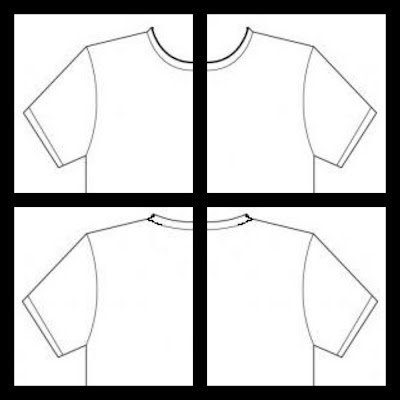
The two colours you are using for the back, will get the same cuts along the side, but the top to bottom cut will be through the centre of the back. You will be left with pieces that look as follows but in 4 different colours:
# Place one back down, right side up, on top of it place the front for that side of the coat, right side down, keeping right sides together. Sew the shoulder seam and the top of the arm, on both sides of the coat. Do not sew the underarms and side seams yet.
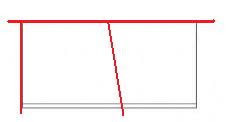
# Before we sew the side seams we want to lengthen the sleeves. So, cut the sleeves off the tops of the T-shirts along the seam. Both the whole sleeves and the 4 half sleeves. You then need to cut a strip off the bottom of the sleeve that is the largest you can cut but keeping it the same width all the way along. i.e. following the red lines below. Then you need to take that loop you have created and cut it open along the seam line.You may need to trim the ends so that your strip is square at each end.
You can either keep each one together, or cut them in half and match back up with other colours so that the front and back are different. I actually used both methods, keeping the front and back of the sleeve together for some colours, and mixing for others.
You will need to sew using a stretch stitch, or if your machine does not have those a zig zag stitch. I used an overlock (serge) stitch to attach and tidy in one go. Keep your seams fairly narrow, you don't want to lose too much of the fabric.
# Keeping right sides together always (not always easy to spot when sewing T-shirts) sew extra layers onto each sleeve. I sewed an extra 2 layers, but could easily have done 1 more if not 2, as I had 5 T-shirts. As it is I think the sleeves are long enough for something that is only ever going to be worn a handful of times for less than 5 minutes at a time. If you are making something for a whole show, you may want to make the sleeves longer by adding those extra layers.
# Repeat with the other side of the coat. Then sew together down the centre back, again with right sides together.
# Once all that is done you can then sew up the side seams and along the underarm seam, keeping right sides together.
You do not need to neaten the front edges, unless the coat is going to be used often. As a knit fabric the T-shirt material will not fray.
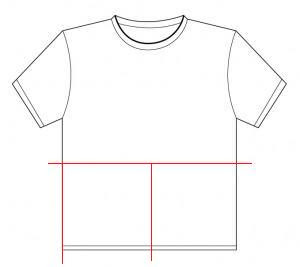
# Now go back to your pile of fabric and choose the 4 colours for the next layer. You need the bottom halves, that you have already cut off for this, straight up a side seam and then straight up the middle, front or back.
Choose your 4, all the time thinking about not putting colours right next to the same colour, either on this row or on the previous row.
Keeping right sides together, sew two pieces together at the side seams, the same with the other side, then sew both of those together at the centre back as you did with the top part.
Once you have your 4 panels together, THEN place right sides together with the top of the coat, and sew all the way around. By now you will have something that looks a bit like this:
# Now you will add another two layers using more or less the same method above, except that we want to widen the coat as it goes down, so you will need to cut your panels slightly differently.
Each panel now needs to be the same width as the panel above it at its top edge, but wider at the bottom edge. You can cut these panels from what is left of the T-shirts, either using the bottoms or using the pieces of the top that you still have left.
I went back to using my cutting mat, ruler and rotary cutter so that I knew my angled lines would still be straight but you should be able to do this with scissors if you are careful.
# You will now have 4 panels that are square on one end but angled on the other as shown above. Keeping the square edges to be the centre front and centre back, and right sides together, sew your 4 panels together in one long strip, then sew that strip to the bottom of the coat you have completed so far.
# Repeat the last row again, but remembering that your panels will need to be wider still as you still want the coat to widen as it goes down. So cut your panels so that the top of the new layer matches in width the bottom of the previous layer.
# Neaten the bottom if you need to, although I managed to work mine so that each of the bottom pieces had T-shirt hem at its bottom edge and did not need to neaten.
It might look like it needs to be longer but the teacher who was playing the part of Joseph is very tall and I was aware that other people will be using the coat at other times, and did not want them to be tripping over the hem. if you feel you have enough fabric for another layer and want to do that, then just follow the same method you used for the last two layers.
A child's version of this costume could be made by using children's T-shirts in a couple of sizes bigger than the child normally wears.
 01:27
01:27
 Unknown


 Posted in


.jpg)
0 comments :
Post a Comment