Earlier in the week I showed you how we made the multi coloured coat for the Joseph story. This week we finished off the Joseph story with what happened in Egypt.
I wasn't responsible for the Pharaoh costume but isn't it amazing. A friend did this. The instructions for the head dress are available to Open the Book Team Members in the UK via the resources pages on the members section of the website.
The costume I was responsible for was When Pharaoh makes Joseph second in command. We needed something he could put on easily. This is what we came up with.
If you didn't have a fancy fabric, like we had for Pharaoh, you combine this with the head dress for a Pharaoh costume.
That is a very basic cloak, but with an extra cream coloured strip down each side of the front edges. Open the Book Team Members, this is the pattern from the website with just simple straight strips attached to each side of the front. What really makes this costume is the collar and the belt.
They are actually quite simple.
Let's start with the collar. You need two curved pieces of fabric the same size and shape. So I started with my fabric doubled.
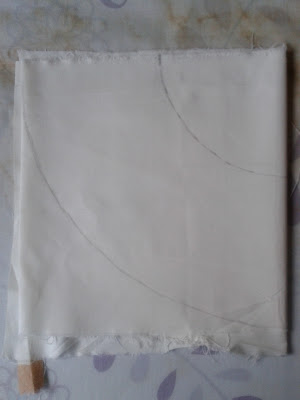
Here, you can see that I had already marked the outside of the curve (Well, half of it, but you will see why that is later). I don't have a pair of compasses big enough to do that so let me show you how I did it by marking the inner curve.
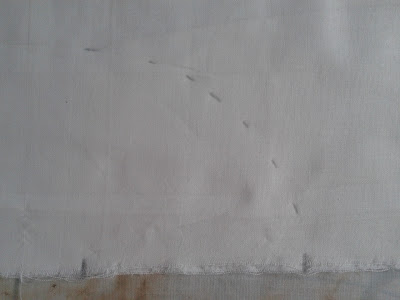
Please excuse my burnt ironing board cover, ooops.
I wanted the radius of this semi circle to be 4 inches, so I kept the 4 inch mark on my ruler on the spot I had already marked as the centre, then swivelled it around and made a set of pencil marks at the corner of the ruler.
I joined those marks up to complete the line. The reason I only marked half of the semi circle is because I was then going to fold the fabric in half again and cut through all 4 layers together to ensure that both panels matched and that both sides of each panel matched.
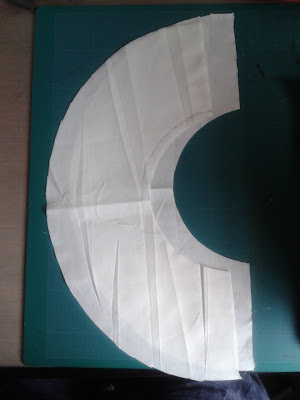
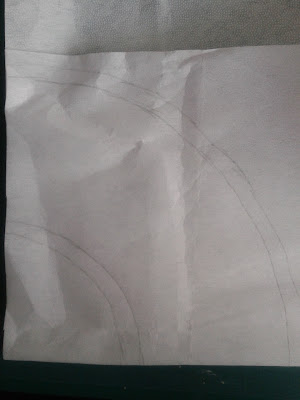
Next you need a piece if interfacing the same shape but slightly smaller all round. The easiest way to do that was to draw around one of the pieces onto the interfacing, then mark where I wanted to trim it, to make it smaller, and cut that.
Next you will need some ties. You can use ribbon, cord, or whatever you have on hand that will work. I still had some bias binding left over from neatening the edges of the robe, so I took that, folded it in half and sewed along it's length, then cut the pieces that I needed.
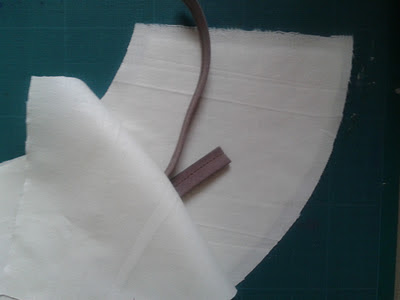
Take the piece of fabric with the interfacing on and place it right side up, so that the interfacing side is down. On top of that place the other piece of fabric, right side down, so that the right sides are together.
Now position your ties.
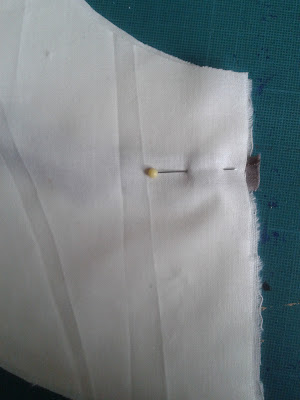
You want them near the inner edge of the straight ends of your semi circle. Position them so that the bulk of their length is between the two layers of fabric, then fold your fabric back and pin in place.
Sew around both straight ends, and the long edge of the curve, leaving the short edge unsewn for now. Make sure you do not catch the ties in any other point on the seam except where you have them pinned.
Next you will need to clip your curve. Cut from the edge of the fabric a few millimetres in towards the stitching line. You want to get close to the stitching but not all the way up to it.
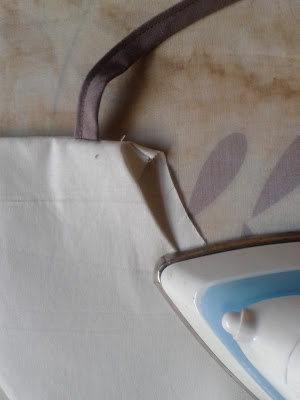
Turn the fabric through so that the right sides are now outside and push out the corners. I find a chopstick works really well for this. Then press your piece flat with a hot iron. If you having trouble getting the curved seam to sit flat right on the seam line, try rolling it between your finger and thumb. Once pressed, it should look like this.
Now clip in inner curve in the same way you clipped the outer curve, but slightly smaller cuts. You can either mark the line that you will fold on or use the edge of the interfacing as your line.
I found the easiest way to then press this curve in, was to work on one side, then flip it over and work on the other side, but you could do whatever works for you.
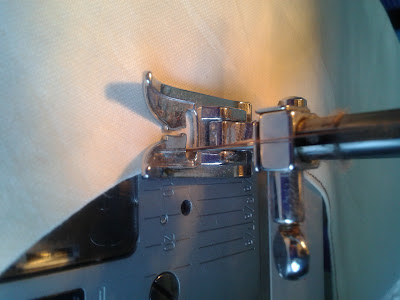
Top stitch along that curve, close to the edge.
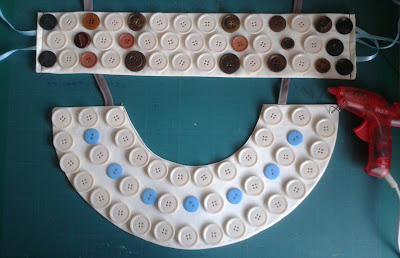
Your final job is to attach all the buttons that will really make this costume what it is.
I bought a pack of large cream buttons and supplemented this with buttons from my button box. First of all I laid them out in a pattern on both the collar and the belt, then hot glued them in place. You could stitch each of them individually, but that was going to take far too long.
If you do choose to hot glue them, BE CAREFUL, hold the buttons by their edges only, especially when pressing them down onto the fabric. If you press in the middle, well, let's just say those buttons have holes in the middle that hot glue can squeeze up through.
The belt is made in much the same way but much easier.
One large rectangle of fabric, folded in half. Attach the interfacing to just one half, sew along the long edge, turn through and press, turn the fabric under at the ends, tuck just a bit of your ties inside, leaving the length outside and top stitch. For the belt I used two ties at each end, but if one works for your that's fine. For the ties on the belt I used some ribbon that I had to hand. The buttons are attached in the same way. And there you have it, an Egyptian costume!
Right now I am working on another Egyptian costume, a long black wig made from an old hat and black yarn, for the Egyptian Princess who rescues baby Moses from the water. I hope to have a post about that up next week.
I wasn't responsible for the Pharaoh costume but isn't it amazing. A friend did this. The instructions for the head dress are available to Open the Book Team Members in the UK via the resources pages on the members section of the website.
The costume I was responsible for was When Pharaoh makes Joseph second in command. We needed something he could put on easily. This is what we came up with.
If you didn't have a fancy fabric, like we had for Pharaoh, you combine this with the head dress for a Pharaoh costume.
That is a very basic cloak, but with an extra cream coloured strip down each side of the front edges. Open the Book Team Members, this is the pattern from the website with just simple straight strips attached to each side of the front. What really makes this costume is the collar and the belt.
They are actually quite simple.
Let's start with the collar. You need two curved pieces of fabric the same size and shape. So I started with my fabric doubled.
Here, you can see that I had already marked the outside of the curve (Well, half of it, but you will see why that is later). I don't have a pair of compasses big enough to do that so let me show you how I did it by marking the inner curve.
Please excuse my burnt ironing board cover, ooops.
I wanted the radius of this semi circle to be 4 inches, so I kept the 4 inch mark on my ruler on the spot I had already marked as the centre, then swivelled it around and made a set of pencil marks at the corner of the ruler.
I joined those marks up to complete the line. The reason I only marked half of the semi circle is because I was then going to fold the fabric in half again and cut through all 4 layers together to ensure that both panels matched and that both sides of each panel matched.
Next you need a piece if interfacing the same shape but slightly smaller all round. The easiest way to do that was to draw around one of the pieces onto the interfacing, then mark where I wanted to trim it, to make it smaller, and cut that.
Iron the interfacing onto the wrong side of one of your pieces of fabric, keeping it in the middle so that there is an even strip around all edges that does not have interfacing on it..
Next you will need some ties. You can use ribbon, cord, or whatever you have on hand that will work. I still had some bias binding left over from neatening the edges of the robe, so I took that, folded it in half and sewed along it's length, then cut the pieces that I needed.
Take the piece of fabric with the interfacing on and place it right side up, so that the interfacing side is down. On top of that place the other piece of fabric, right side down, so that the right sides are together.
Now position your ties.
You want them near the inner edge of the straight ends of your semi circle. Position them so that the bulk of their length is between the two layers of fabric, then fold your fabric back and pin in place.
Sew around both straight ends, and the long edge of the curve, leaving the short edge unsewn for now. Make sure you do not catch the ties in any other point on the seam except where you have them pinned.
Next you will need to clip your curve. Cut from the edge of the fabric a few millimetres in towards the stitching line. You want to get close to the stitching but not all the way up to it.
Turn the fabric through so that the right sides are now outside and push out the corners. I find a chopstick works really well for this. Then press your piece flat with a hot iron. If you having trouble getting the curved seam to sit flat right on the seam line, try rolling it between your finger and thumb. Once pressed, it should look like this.
Now clip in inner curve in the same way you clipped the outer curve, but slightly smaller cuts. You can either mark the line that you will fold on or use the edge of the interfacing as your line.
I found the easiest way to then press this curve in, was to work on one side, then flip it over and work on the other side, but you could do whatever works for you.
Top stitch along that curve, close to the edge.
Your final job is to attach all the buttons that will really make this costume what it is.
I bought a pack of large cream buttons and supplemented this with buttons from my button box. First of all I laid them out in a pattern on both the collar and the belt, then hot glued them in place. You could stitch each of them individually, but that was going to take far too long.
If you do choose to hot glue them, BE CAREFUL, hold the buttons by their edges only, especially when pressing them down onto the fabric. If you press in the middle, well, let's just say those buttons have holes in the middle that hot glue can squeeze up through.
The belt is made in much the same way but much easier.
One large rectangle of fabric, folded in half. Attach the interfacing to just one half, sew along the long edge, turn through and press, turn the fabric under at the ends, tuck just a bit of your ties inside, leaving the length outside and top stitch. For the belt I used two ties at each end, but if one works for your that's fine. For the ties on the belt I used some ribbon that I had to hand. The buttons are attached in the same way. And there you have it, an Egyptian costume!
Right now I am working on another Egyptian costume, a long black wig made from an old hat and black yarn, for the Egyptian Princess who rescues baby Moses from the water. I hope to have a post about that up next week.
 00:02
00:02
 Unknown






 Posted in


.jpg)
0 comments :
Post a Comment