Monday, 30 April 2012

holy experience


Another week, another list.  Here we go then, in no particular order, On Monday 30th April 2012 I am thankful for . . . . 

771.  Painkillers and prayers that are holding this toothache at bay just enough for me to get through my days.

772.  When I finally have time to visit the dentist it is only just down the road.

773.  Awesome night away with hubby.  We managed to get some walking in around Bath even though it was terrible weather.


774.  Did some art supplies shopping while we were there.  Grabbed 2 pads of the watercolour paper I am using in one of my online courses at an incredible price and a few colours of Neocolor II, watercolour crayons.

775.  Wonderful to see a friend back at church yesterday, who has been ill for a while.  And to see a smile on her face too!

776.  5th Sunday event yesterday went well.  Every time a month has 5th Sunday we are asking the children of Sundays Cool to invite their friends to church.  We only had 2 visitors this time but it went well.

777.  Youngest son was awesome in his first full performance with the local musical theatre group.  And they all coped very well with the rather dramatic events of the evening.

778.  The cast member who collapsed mid performance is recovering well at home.

779.  Exciting times as the Unlocking the Heart of the Artist course begins.  We have had our first, test skype call, and have another coming this week.

780.

If you wish to participate in blogging about your list of 1000 gifts or in Thankful Thursday, you can do so by clicking on the banners at the top of this post.

Before you go, why not check out my recipes index page, or my craft projects index page, I am sure you will find something there to interest you.

Sunday, 29 April 2012


Pin It

This page started in my art journal, but there came a point at which I knew that rather than making a page in honour of a friend and letting them have a photo of it, I needed to actually give them the page.  So, I cut it out of my art journal.  Thankfully it is a journal with perforated pages, so I had a line that I knew I could cut down, which made things easier.

The page began with a ripped up map, which I glued down with matt gel medium.


I scribbled over this with three shades of green Neocolor II. Which I then worked in using gesso rather than water.


I knew from the start what I wanted to be the main feature of this page.  I went online and found the Arabic word for Hope.  I printed it out as large as I could get it, and then traced that onto the page.

I outlined it using a pitt pen.


I then filled it in using a black paint pen.  My paint pen got a bit clogged at times and when I pushed down on it to get paint flowing again it made puddles of the colour.  So I grabbed a small brush and used that to further move that paint around.


Then I wrote around the outside and across the bottom.  I think my friends who I gave it to, liked it.


If you read the first sentence of the writing around the outside, you will understand the reason I used a ripped up map for the background.  I love using my creative skills to make gifts that will bless people.  Recently I made a decorated tin of encouraging cards for a friend who was struggling.  You can check out the sites I link up to over in my sidebar. Before you go, why not check out my recipes index page, or my craft projects index page, I am sure you will find something there to interest you.


HOPE!

Thursday, 26 April 2012

We all know the feeling; summer's around the corner, we're thinking about holidays, hitting the town and wanting to look our best. What's the solution? New hair of course. Here are a few of our favourite spring makeovers!

Polly Whitehouse
Daringly short spring bob


Kelly Cates/Dalglish
Freshly bobbed


Carol Kirkwood
What a difference this haircut makes


Sarah-Jane Mee
A new shorter auburn bob


Monday, 23 April 2012

holy experience


Another week, another list.  Here we go then, in no particular order, On Monday 23rd April 2012 I am thankful for . . . . 

759.  Encouragement before and after whole church "business meeting".  In the past these meetings have been used (more than once) by individuals to bash the kids team (unfairly in my opinion) and as leader of that team these meetings make me anxious.  But this time it was amazing.  I had 3 new volunteers for the kids team, 1 even before the need for volunteers was mentioned.  God is good.

760.  Leadership Interactive went well, I'm learning lots from the mini sermons being given by other members of the class.

761.  I now have 3 whole weeks to prepare for the next leadership interactive where I will be giving my mini sermon.  I'm nervous but I have plenty of time to get this written right.

762.  More encouragement on Tuesday when the head teacher of the school our church has the closest relationship with spoke to me about something I had been hoping to be able to do.  I thought he had maybe forgotten but didn't want to remind him in case he felt I was being pushy, and HE approached me about it!

763.  Hope for a friend who is struggling.

764.  New parts for my CPAP mask at annual clinic appointment.  That should make it fit better, these part do have a habit of wearing out.

765.  Being blessed beyond measure by hubby when he OK'd me taking part in an 8 month online class for Christian artists.  At last count there were only 3 places left, so if you are interested, you'd better get in there FAST.


766.  More encouragement once I joined the facebook group for the course, from other artists who like my work.  That still feels weird to me.

767.  Plans came together for "5th Sunday" where the Sunday's Cool children get to invite their friends to church.  Got the children working on invitations and so on yesterday and 2 of the teen girls volunteered to do the drama, so its going to be a good time.

768.  Back to the online course.  one of the books we need will not arrive in time for the start date because I have had to order it from America, but the course leader has promised that she will make sure I, and anyone else affected this way, will not miss out.

769.  While a course I was supposed to go to this coming week has been cancelled, they will be refunding all monies paid.  I can't however get the money back for the hotel room I booked.  So, hubby is taking a couple of days off work and we are heading away for one night this week, so the room booking doesn't go to waste.

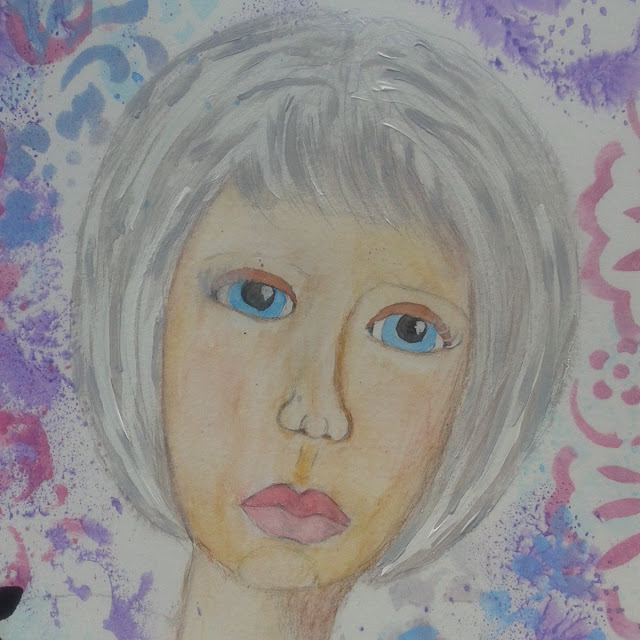
770.  While I haven;'t been feeling 100% this week, I did take time to spend some time in my craft room.  I like the silver haired lady that I ended up working on.


771.

If you wish to participate in blogging about your list of 1000 gifts or in Thankful Thursday, you can do so by clicking on the banners at the top of this post.

Before you go, why not check out my recipes index page, or my craft projects index page, I am sure you will find something there to interest you.

Sunday, 22 April 2012

Another day, another Life Book page for you.  This is the full lesson from week 10 of Life Book.  I shared my page from week 11 yesterday, because I had worked these lessons out of order.


Pin It

This page had a much more scrapbook feel to it than our normal Life Book pages.  We started by sticking two pages of watercolour paper together with sticky tape.  This turned out to be a mistake for me, as you will soon see if you read on, but it was what was suggested in the lesson, so I went with it.  I cut 1 inch off the long side of one of the pages and then covered both sides with a base coat of gesso following up with with watercolour crayons and gesso.


I chose the paler one to be the front and the brighter one to be the back.

When working the watercolour over the sticky tape, some of the base coat of gesso came up, peeling up as if it was masking fluid being rubbed off.  Working over that with gesso and acrylics, helped, but it got worse later when I needed to alter something.


This lesson was all about celebrating our influence on others (you could do their influence on you if you preferred, but I wanted to go with this), so I chose some photos and worked out a layout I liked.


I glued a piece of ribbon across the page and made pencil marks where I wanted the pictures to go.  I did not think this out carefully enough and did not consider what would happen to any photos put over the fold in the page.

I then did some stamping around the areas where the photos would go.


I worked on altering some of the photos.  I used sandpaper around the edges and then wet certain parts of the photo and scratched into it.


That's an old photo of my husband from when we were dating.

I mounted all the photos and glued them down.  This is where things really started to go wrong and I realised the problems I was going to have with folding the page.  The top photo wasn't too bad because there was was quite a bit of photo either side of the fold, but the bottom one was a different matter.  The part to the left of the fold just would not stay glued down, no matter what I tried.  In the end I cut the left hand edge of that photo and it's mounting paper.  But that pulled up all colour that was laid down over the sticky tape used at the start.


I used some acrylic paint and smudged it over that area with my finger.


I also added text to the page and began embellishing the page with other scrap booking goodies.


I really didn't like the text in the top left, so cut out a piece of card to fit that area, and stamped and embossed part of the title while writing the other part.

But that left the page feeling off balanced with that blank space at the bottom right, so I used a tag shaped peel off on the same card used at the top left, cut it out and glued it down.


Take a look at some of the details:


The back of the flap was made into a list of the people who I have had the privilege of being a positive influence in their lives.  To store the page and later make it into a page in the book, I needed to use a paper clip, to keep it folded.


You can check out the sites I link up to over in my sidebar. Before you go, why not check out my recipes index page, or my craft projects index page, I am sure you will find something there to interest you.

Saturday, 21 April 2012

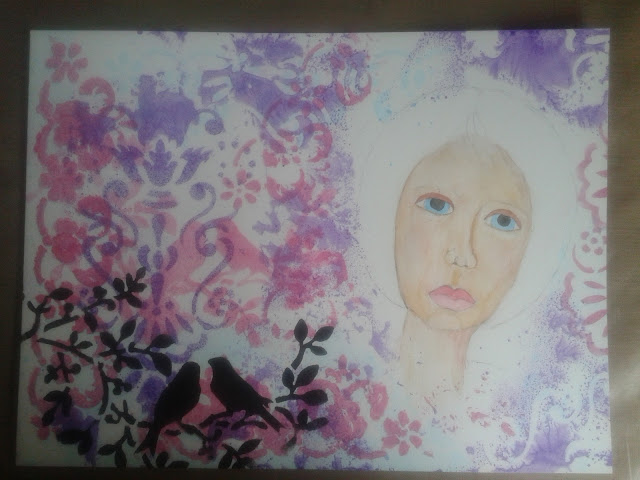
This is my page from Week 11 of Life Book.  I sometimes do lessons out of order, either because I need to get some supplies or because I need to print something out in order to do the lesson and so on.  I did week 10 after this page and will share that soon. This was one of the mini, infill lessons and focussed on stencilling to cover most of the page.


Pin It
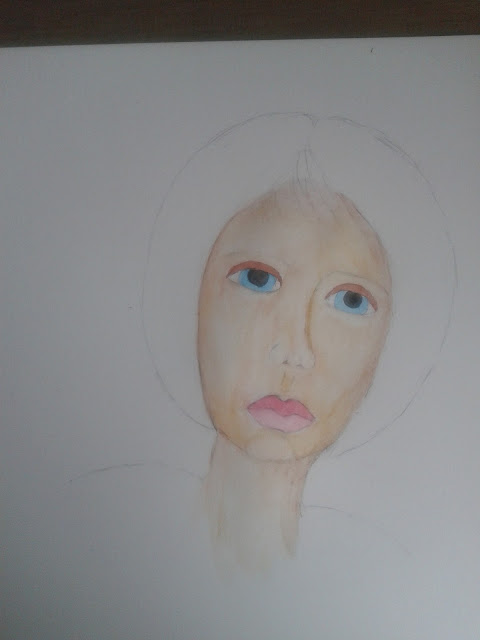
I started with pencilling in the face.


I really struggled with the lips, trying over and over again and I still didn't get them right.  Oh well, keep trying and keep learning, that's what lessons are all about.


If you checked out my last Life book Page you will know that was in honour of getting my hair cut short to benefit two charities.  This page, I decided to do with short hair in honour of my newly short hair.

Next I coloured in the face using watercolour crayons, and a graphite pencil.


Two of the Life Book teachers had supplied stencil templates for you to make your own stencils, but I had enough of my own.  I don't have any purchased spray inks, so have to make my own and they don't always work as well as the purchased ones.  Particularly when flipping over the stencil to put the negative image down somewhere else on the page.  It tends to just splodge!  I like that word, SPLODGE!


If you look in the picture above, to the top right corner, that's a flipped over stencil, and the bottom right, where it is purple.  Also, some of the colours I have made into spray inks, were too wet and just seeped under the edges of the stencil, such as the pink down the left hand side.  If I had the money I would invest in some spray inks, but I don't.  However, if anyone wants to buy me some arty gifties, I would be more than happy to receive them. GRIN!

I did cheat with the black, and use a sponge to put paint on through the stencil, rather than spray ink.  I like the clarity that gives to the image, the crisp edges.  I looked at it and decided that there were still some areas that needed a little more stencilling and went in with a final layer of blue, again, paint sponged through a stencil.


You might notice I have adjusted the nose very slightly to make it on more of the right angle across the face.  I also painted her hair at this point.  I decided to go for grey hair.


I used a layer of iridescent white all over the hair, then highlighted it with grey and with white.  I struggle with her eye lashes.  On the right hand eye (as you look at the picture) I got them just right, nice and thin with just the right flick that I wanted. But the other eye, they kept coming out thicker.  I tried turning the paper around, but then I couldn't get the flick right because I was working upside down.  So I did what I could and left it at that.

Overall, for a fill in page that was really more about techniques than anything else, I am pleased with it.

You can check out the sites I link up to over in my sidebar. Before you go, why not check out my recipes index page, or my craft projects index page, I am sure you will find something there to interest you.
This soup would be excellent with either Scandinavian Rye Bread or German Potato Bread that I have made recently.


Pin It

For 2 decent portions you will need:


1/2 large head cauliflower, broken into florets
1/2 small onion, chopped
2 teaspoons curry powder
freshly ground black pepper
1/4 teaspoon cumin
Spray oil
500ml vegetable stock (I use a low sodium brand)
2 tbsp creme fraiche
1/2 lemon (or lime)
salt, to taste


Heat oven to 425f, 215c
Put the cauliflower florets and chopped onion into a bowl and spray well with iol, turning and spraying again to ensure an even coating.


Toss the cauliflower florets with the chopped onion, curry powder, pepper, and cumin.


Spread out on the baking pan and cook for about 20 to 30 minutes, turning frequently, until tender.


Put the cauliflower and onion into a saucepan with the stock.


Bring to a boil. Cover and simmer for 5 to 10 minutes, or until very tender. Blend, either using a standard blender or a stick blender. You can either blend the creme fraiche into the soup or serve it as a drizzle or dollop on top.


When you are blending, add extra boiling water if needed to get the soup to a consistency you prefer.
Add the juice of just 1/2 lemon, and season to taste with salt and pepper.

Ladle into bowls and garnish with parsley, chopped green onion, or cilantro.  I didn't have any of those so ate it just as it was, mmmmmmmm


You can check out the sites I link up to over in my sidebar. Before you go, why not check out my recipes index page, or my craft projects index page, I am sure you will find something there to interest you.